
Smart Steps to Interactive IPTV
January 18, 2018
As we hear over and over again linear TV channels are losing their popularity so why does a service provider need to offer linear channels when their subscribers have access to YouTube, Netflix and a variety of large, or not so large, online content streaming services?
Well, we believe it is premature to write off the linear TV.
Modern multiscreen, IP based, TV solutions allow service providers to offer many interesting features and functions, which are based on linear TV content and that were difficult to even imagine not so many years ago.
However, the introduction of these interactive features and functions have typically presented some serious hurdles to an operator. Substantial investment in equipment, platforms and content rights, as well as serious integration work and a competent team, have been required.
Let’s look at how linear TV channels can be enhanced with new interactive features that radically change the very process of watching TV allowing operators to meet the demands of their customers and overcome the implementation issues.
Enable an Interactive Experience
The first step on the way to interactive IPTV is to enable viewers to interact with a linear channel that they are watching by enabling pause, rewind, fast forward and play. These basic interactive features may then be enhanced to allow users to move quickly and simply to the beginning of a program if they have missed the start.
The next logical step is to allow a user to move backwards in time to view complete programs that they have missed or that they wish to view again.
Finally, a customer may be allowed to select a specific program from a linear channel and record and manage this content in their own network storage area.
All these features may be supported by implementing a linear TV archive and streaming solution:
- Pause LiveTV
- Restart TV
- Time shift TV and Catch UP
- Network PVR
Extend to Multiscreen and OTT
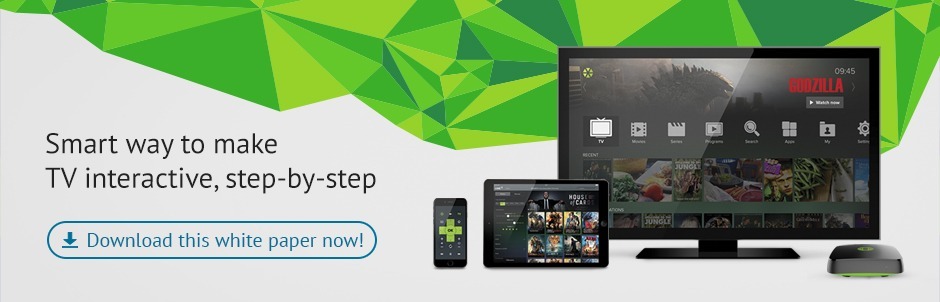
The second step is to ensure that content may be viewed not only on a TV set with a Set-Top Box (STB) but also on a smartphone, tablet or PC, both inside the service provider’s network and outside of it.
In the language of marketing, the delivery of digital TV simultaneously to different types of devices is called “multiscreen”. And the delivery of content outside the managed IP network is called “Over the top” or OTT.
“Multiscreen” allows you to freely transfer viewing a program from screen to screen, move from TV to smartphone and back and enjoy all the benefits of interactive TV on any device where ever you are.
Deliver an Interactive Solution
To implement the interactive TV functions outlined above, we need a solution for streaming content that supports such functions. The market offers a sufficient number of software media servers that allow you to organize streaming of TV content and it is also possibly to build your own streaming solution.
However, to implement the archive of linear channels with all the functions we are discussing, the media server has to be able to record, store and distribute video to subscribers. To support “multiscreen” streaming, the media server has to be able to prepare video in the formats, protocols and profiles that are suitable for playback on different end-user devices – tablets, smartphones, PCs and TVs.
Finally, in order to ensure the stability of your TV service and to ensure that the video stream is not interrupted and automatically adjusts to the quality of the Internet connection on the viewer’s side, the server should be able to simultaneously operate several video profiles with different bit rates for each type of device.
Seems difficult and expensive? Not too long ago it was, but today SmartLabs provide you with a solution that will allow you to make the transition to the world of interactive multiscreen television without any special knowledge or skills, and without significant expense.
SmartMEDIA Software Video Server
So, in this issue we want to tell you how to implement multiscreen streaming of TV content using the SmartMEDIA software video server.
We developed the first version of SmartMEDIA more than 10 years ago and since then we have been continuously developing and improving it. Now SmartMEDIA is used in Rostelecom (Interactive TV, TV 2.0), which is the largest Russian digital TV operator, and by a number of European digital TV operators, serving millions of subscribers.
All these SmartMEDIA installations are carrier-grade solutions with high fault tolerance, performance and the highest level of streaming quality of TV content. The total capacity of SmartMEDIA installations currently reaches the level of up to several Tb per second. You have to admit, that’s an excellent “track record”!
We are proud to say that SmartMEDIA meets all the current needs of TV operators: it supports current broadcasting standards, has built-in content encryption tools and supports integration and external management through the json rpc API.
A number of unique technical features have also been implemented in SmartMEDIA, which are already used by several operators, such as the encryption of multicast traffic using Widevine DRM.
We would like to invite you to assess the complexity (or rather the simplicity) of the implementation of streaming TV content using the trial version of SmartMEDIA. Installation and configuration of SmartMEDIA are easy, even for those who are not familiar with the specifics of solutions for streaming video.
Please, follow these simple steps:
Step 1: Download and install SmartMEDIA. SmartMEDIA trial version includes smartmedia-recorder, smartmedia-fasthls, smartmedia-nginx and smartmedia-utils components. All of these components are pre-configured for an easy start-up and do not require any special knowledge of video broadcasting systems.
Using a server based on CentOS 6/CentOS 7 operating system, run the following commands for installation:
in CentOS 6:
service iptables stop

chkconfig iptables off

setenforce 0

rpm -ihv http://smartlabs-public:6vTh5WVrQlgF@repo.smartlabs.tv/repo/public/centos/6/x86_64/smartlabs-repo-1.0-1.el6.x86_64.rpm

yum install smartmedia
in CentOS 7:
systemctl stop firewalld

systemctl disable firewalld

setenforce 0

rpm -ihv http://smartlabs-public:6vTh5WVrQlgF@repo.smartlabs.tv/repo/public/centos/7/x86_64/smartlabs-repo-1.0-1.el7.centos.x86_64.rpm

yum install smartmedia
For more information see the instruction.
Step 2: Get and install the license. Send us an email with the UUID of your system (which is found in the log file of any of the services), and we will forward you the license file. It should be copied by any available means to the file /opt/smartlabs/smartmedia/license.bin on the server.
Step 3: Run and use. After you have received the license file, it is possible to start the server.
In CentOS 6:
service smartRecord start
service fastHLS start
in CentOS 7:
systemctl reset-failed
systemctl start smartRecord
systemctl start fastHLS
Note: When the server is restarted, the services are started automatically.
And Now Live Example
For your convenience, we have prepared a clear and simple example of how to assemble OTT multiscreen broadcasting in DASH and HLS formats with Time Shift TV and with the ability to play on different types of devices based on the multicast TS stream.
In the next issues, we are going to talk in detail about content protection systems and our new products. We welcome any questions and wishes on the subject of our articles.
We recommend to read:
Featured News


Smartlabs revamped DRM for Cyprian Primetel
January 31, 2025
Smartlabs Unveils 2024 Year-End Updates
December 20, 2024

17 milestones in 17 years
December 13, 2024